It is good to know that we can germinate chestnuts, our own chestnuts from those we buy in the supermarket or also from chestnuts that we can harvest in autumn in many of our forests or parks.

For those of us who enjoy studying and experimenting at home with germinating seeds or trying to grow plants from a cutting, it is good to try new species.
Contents
Germinate chestnuts
To experience this chestnut germination proposal we will not need a lot of space, and after germination we can have it in our house for a while while we see how it grows. Of course, as soon as the right temperatures arrive, we will have to transplant it into a larger pot or directly into our orchard or garden.
Another very cool option is to go to the mountains and repopulate our forests with our own trees, a very interesting plan to do with children.
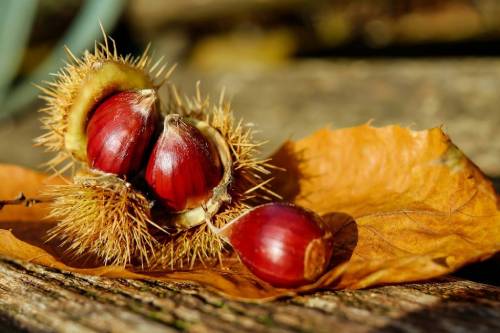
The best time to try to germinate our chestnuts is in the fall when the chestnut trees lay their fruit on the ground. You can take advantage of it and go out for an afternoon to pick up the fruits while walking in nature. Although don’t worry if you don’t have a chestnut tree nearby where you can pick them up, as we said, we can always germinate chestnuts bought from the supermarket. Of course, it is important to always do this by looking at the chestnut picking date on the label (it usually comes). At home, we will hydrate the chestnut to increase the possibility of germination. You can see all of this in the video.
How to germinate chestnuts
Now let’s see how to germinate chestnuts. In the following video it’s explained, but for those who prefer written tutorials, or for those who like to watch the video and then check out the notes, we write it step by step below.
Hydrate
The first thing we are going to do is hydrate the chestnuts. I put 3. You can put this amount or more, if you want to do it with children.
To hydrate them, we will place them in a glass with water and leave them there overnight. An important tip is that if the chestnut floats, it is useless, as it probably won’t germinate.
cut the tip
The next thing we will do in our step by step for sprouting chestnuts for planting is to cut off the tip. To do this, we use a very sharp knife. You can delicately open the skin of the chestnut a little. This will help it germinate faster.
Substrate
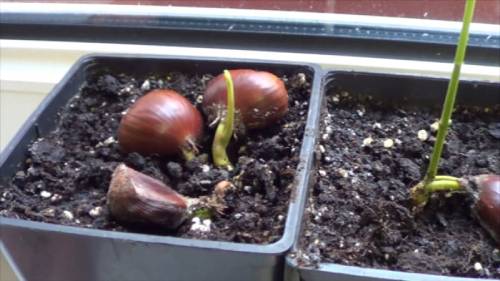
We will fill a pot with a well-watered substrate. It is important that it is a pot with depth. We place the flat part on the substrate, as seen in the video, and bury half the chestnut.
We will cover the chestnut tree with a damp paper towel, simulating the floor of the autumn forest, where humidity remains assured with the leaves falling from the trees.
Germination
We will maintain the humidity of the substrate and the paper for about 20 days, and we will see how the chestnut bud begins to appear. And we continue the process and more or less after 2 months our plant will start to grow. We remove the paper but the humidity remains.
Two months later, we will already have our little trees starting to grow. We can keep it in the pot, move it to a bigger pot, or transplant it into the forest, whichever suits us best.
👇 YOU CAN SAVE THIS ARTICLE ON PINTEREST 👇
